


Overnight Oats
Here, a formula that works every time, plus tips and tricks for customizing.

- Nutritional Analysis
- Per Serving
- Calories
- 190 calorie
- Total Fat
- 4 grams
- Saturated Fat
- 0 grams
- Sodium
- 62 milligrams
- Carbohydrates
- 34 grams
- Dietary Fiber
- 6 grams
- Protein
- 6 grams
- Sugar
- 8 grams
Article by Heath Goldman
Don’t let the name fool you: overnight oats take just a few minutes to prepare. A no-cook wonder, this popular breakfast gets its beauty sleep overnight in the refrigerator and is at its best the following morning. Learning how to make overnight oats means you can have a wholesome and filling breakfast any day of the week — all you have to do is remember to quickly combine a few ingredients the night before. Here’s everything you need to know about overnight oats.
What Are Overnight Oats?
Overnight oats are uncooked oats that you soak overnight in the refrigerator in a container of yogurt, milk or another liquid. While oatmeal is meant to be eaten hot, overnight oats are cool and creamy. Like oatmeal, overnight oats can be made with different flavor profiles by switching up its soaking liquid and what you mix into it.
How to Make Overnight Oats like a Pro
The Best Oats to Use
- Overnight Steel-Cut Oats: Steel-cut oats are chopped up pieces of oats. They take longer to cook than rolled oats because the latter has been steamed and rolled out into large flakes. To make overnight steel-cut oats, we recommend soaking them for at least two nights instead of one.
- Overnight Instant Oats: Instant or quick oats are steamed longer than rolled oats and rolled out into even flatter flakes. While you can use them to make overnight oatmeal, instant oats are wont to dissolve, so you’ll end up with a more pudding-like creation (but hey, it’ll still be tasty and nourishing).
Overnight Oats Using Yogurt vs Milk: You can use cow’s milk, oat milk or any plant-based milk to make overnight oats. For richer, creamier results, we also like adding regular yogurt or plant-based yogurt. The best ratio of milk to oats is 1:1 oats to milk. If you want to add additional creaminess with yogurt, you can add half as much yogurt as milk, for a ratio of 2:2:1 for oats:milk:yogurt.
Overnight Oats Toppings Ideas: Part of the fun of overnight oats is that you can customize them with different sorts of toppings — from berries to chocolate chips — so you never get bored.
- Fruit: We prefer to stir in lighter fruit like berries the night before and add heavier fruits like banana slices in the morning, so the fruit doesn’t all sink to the bottom.
- Mix-Ins: The sky’s the limit when it comes to mix-ins, but some of our favorites include: chopped mango, pomegranate seeds, hazelnuts, chocolate, tahini, banana slices, strawberry slices, orange zest and ground cardamom.
- Crisp toppings: Similarly, we recommend saving crisp toppings like nuts and cereal for topping just before you eat the oats in the morning, lest they get soggy.
The Best Overnight Oats Containers
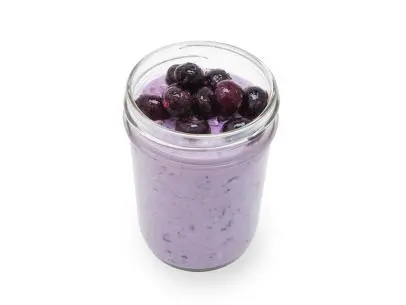
You can make and serve overnight oats in any sort of vessel, although we like making them in the container that we plan on eating them in. Typically, we make overnight oats in jars that we can grab and eat on the go or at the kitchen table.
How Long Do Overnight Oats Last?
We recommend storing overnight oats in the refrigerator in airtight containers for up to five days. That means if you're meal-prepping on Sunday, you can make a work week’s worth of overnight oats and not have to think about breakfast again until Saturday. How convenient.
Overnight Oats
- Level: Easy
- Total: 5 hr 5 min
- Prep: 5 min
- Inactive: 5 hr
- Yield: 1 serving
-
- Nutritional Analysis
- Per Serving
- Calories
- 190 calorie
- Total Fat
- 4 grams
- Saturated Fat
- 0 grams
- Sodium
- 62 milligrams
- Carbohydrates
- 34 grams
- Dietary Fiber
- 6 grams
- Protein
- 6 grams
- Sugar
- 8 grams
Ingredients
Directions
- Add the desired amounts of milk, oats, yogurt, chia seeds and banana to a jar or container and give them a good stir. Refrigerate overnight or for at least 5 hours.
- In the morning, add additional liquid if you'd like. Once you achieve the desired consistency, top with fruit, nuts, nut butter, seeds, protein powder, granola, coconut, spices, zest or vanilla extract.
Cook’s Note
The mixture will keep for up to 2 days. If you don't add the banana, up to 4 days. However, once you are experienced, you'll have no problem whipping up another batch midweek if needed!